Loading...
| How to install |
|---|
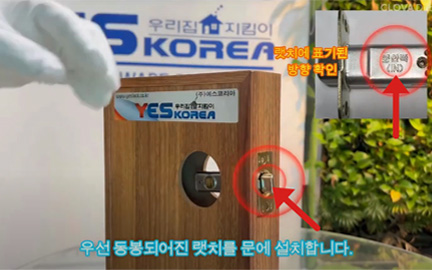 |
01 _ If you look at the lacth, it says it is on the inside of the door. (The grooved side of the locking function is on inside. The other side is not grooved.) |
|---|
| 02 _ The lacth bolt can be rotated to match the door closing direction. (At this time, install in accordance with the direction indicated on the latch.) | 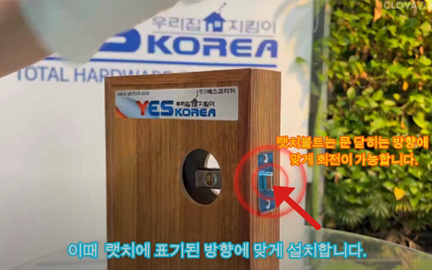 |
|---|
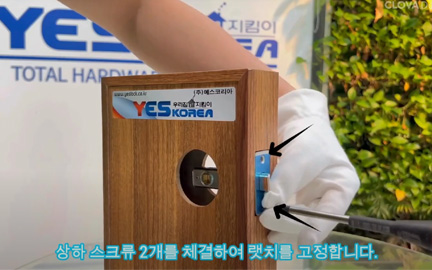 |
03 _ Secure the latch by tightening the two upper and lower screws. |
|---|
| 04 _ After installing the latch, install each axis into the latch, then press the button on each axis ti install it into the latch hole. (Insert by pressing the brass button) | 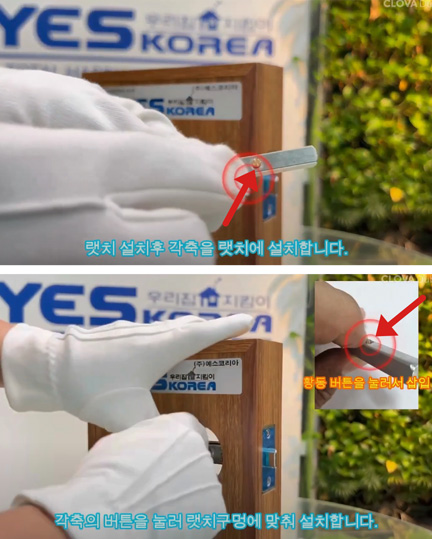 |
|---|
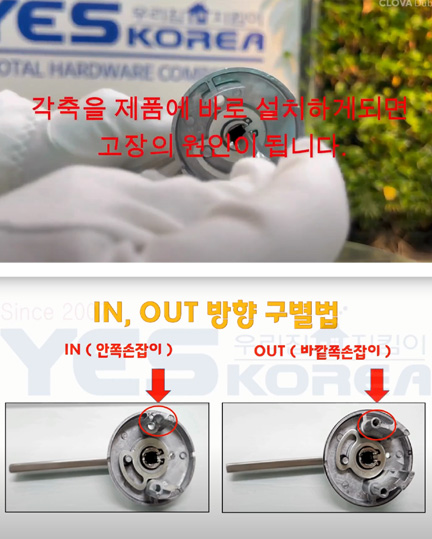 |
05 _ If each axis is installed directly on the product, it may cause a malfunction. |
|---|
| 06 _ Check the IN and OUT directions of the product and install it horizontally (normally the outer lever must move downward) |  |
|---|
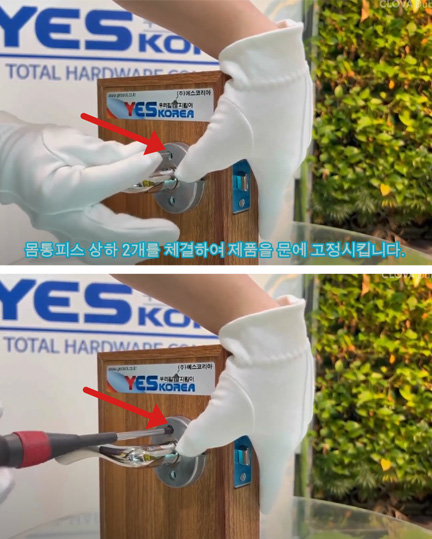 |
07 _ Fasten the top and bottom two body pieces to secure the product to the door. |
|---|
| 08 _ Next, assemble the IN side plate that fits into the IN side hole. Assemble the other side in the same way. | 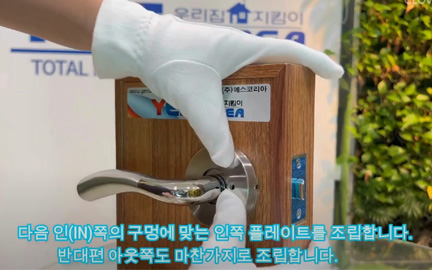 |
|---|
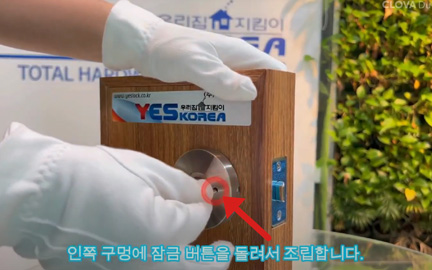 |
09 _ Assemble by turning the lock button into the inner hole. |
|---|
| 10 _ After installation is complete, check for any abnormalities through operation inspection. |  |
|---|
| Integral Lock | Lever Type Lock for front doors |
Lever Type Lock for beds |
|
|---|---|---|---|
| Lever Type Lock for bathrooms |
Cylindrical Lock for wooden door |
31LC series stainless steel |
|
| How to install |
|---|
|
|---|
| 01 If you look at the lacth, it says it is on the inside of the door. (The grooved side of the locking function is on inside. The other side is not grooved.) |
|
|---|
| 02 The lacth bolt can be rotated to match the door closing direction. (At this time, install in accordance with the direction indicated on the latch.) |
|
|---|
| 03 Secure the latch by tightening the two upper and lower screws. |
|
|---|
| 04 After installing the latch, install each axis into the latch, then press the button on each axis ti install it into the latch hole. (Insert by pressing the brass button) |
|
|---|
| 05 If each axis is installed directly on the product, it may cause a malfunction. |
|
|---|
| 06 Check the IN and OUT directions of the product and install it horizontally (normally the outer lever must move downward) |
|
|---|
| 07 Fasten the top and bottom two body pieces to secure the product to the door. |
|
|---|
| 08 Next, assemble the IN side plate that fits into the IN side hole. Assemble the other side in the same way. |
|
|---|
| 09 Assemble by turning the lock button into the inner hole. |
|
|---|
| 10 After installation is complete, check for any abnormalities through operation inspection. |