Loading...
| How to install |
|---|
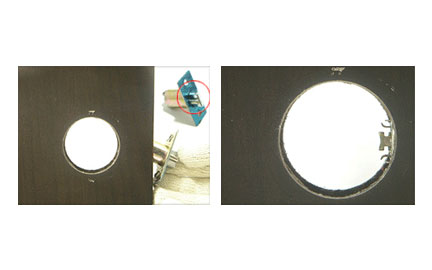 |
01 _ Insert the latch included in the package. (Note: make sure that the curved part facing indoors) |
|---|
|
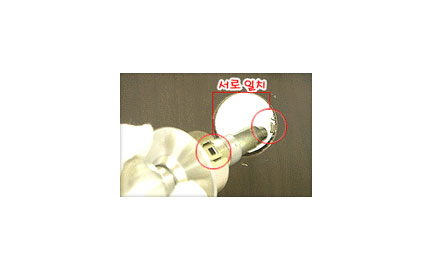
02
_
As shown in the picture, there is a small hole on the side that has a locking function. |
 |
|---|
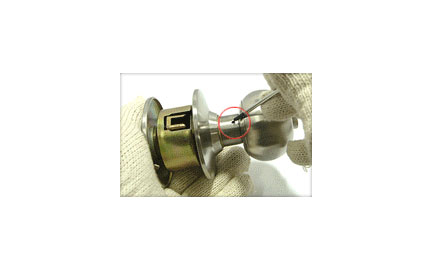 |
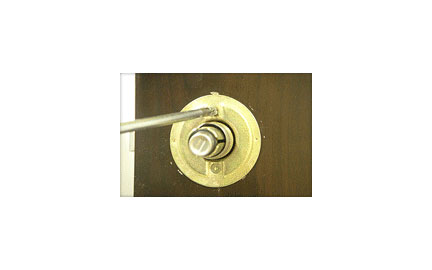
03 _ Press it firmly with a pointed object sized enough to fit into the hole. |
|---|
|
04
_
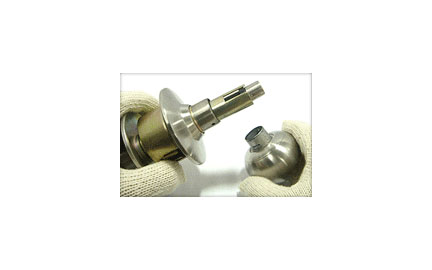
When pressed as in Step 3, it is separated as shown in the picture above. |
 |
|---|
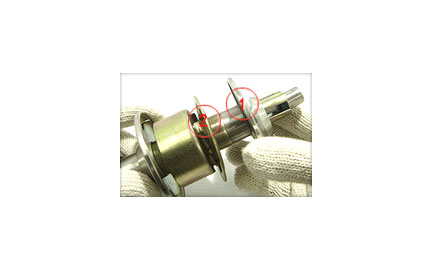 |
05 _ Separate the ① disc and ② adhesion plate in order. |
|---|
| 06 _ This image illustrates when it is completely separated before installation. | 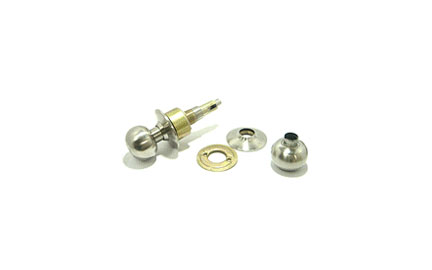 |
|---|
 |
07 _ Insert the separated cylindrical handle to exactly fit the latch. |
|---|
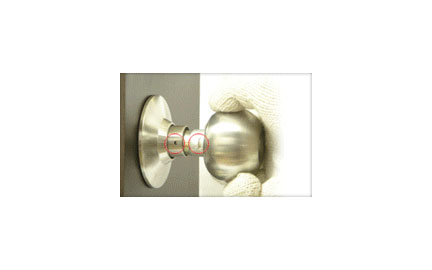
| 08 _ Make sure that the cylindrical handle and the latch are correctly matched by checking from the inside of the room. | 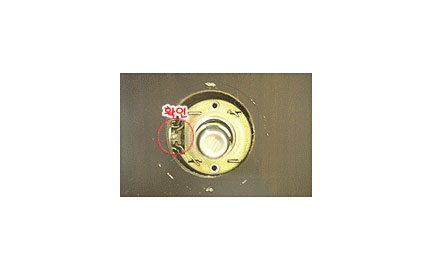 |
|---|
 |
09 _ After that, insert Part No.2 previously removed before installation (as explained in the Step 6) and fix it with the enclosed piece. |
|---|
| 10 _ Turn int the Part No.1 (previously removed in the Step 6). | 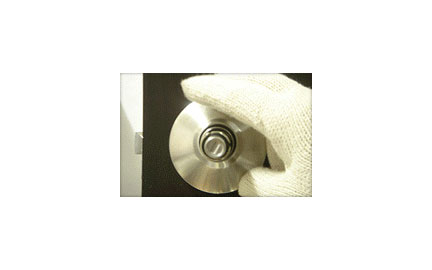 |
|---|
 |
11 _ Finally, press the cylindrical handle to fit the hole shown in the picture to complete the installation. |
|---|
| Integral Lock | Lever Type Lock for front doors |
Lever Type Lock for beds |
|
|---|---|---|---|
| Lever Type Lock for bathrooms |
Cylindrical Lock for wooden door |
31LC series stainless steel |
|
| How to install |
|---|
|
|---|
| 01 Insert the latch included in the package. (Note: make sure that the curved part facing indoors) |
|
|---|
| 02 As shown in the picture, there is a small hole on the side that has a locking function. |
|
|---|
| 03 Press it firmly with a pointed object sized enough to fit into the hole. |
|
|---|
| 04 When pressed as in Step 3, it is separated as shown in the picture above. |
|
|---|
| 05 Separate the ① disc and ② adhesion plate in order. |
|
|---|
| 06 This image illustrates when it is completely separated before installation. |
|
|---|
| 07 Insert the separated cylindrical handle to exactly fit the latch. |
|
|---|
| 08 Make sure that the cylindrical handle and the latch are correctly matched by checking from the inside of the room. |
|
|---|
| 09 After that, insert Part No.2 previously removed before installation (as explained in the Step 6) and fix it with the enclosed piece. |
|
|---|
| 10 Turn int the Part No.1 (previously removed in the Step 6). |
|
|---|
| 11 Finally, press the cylindrical handle to fit the hole shown in the picture to complete the installation. |